Monday, October 27, 2008

Disc Brake Bracket

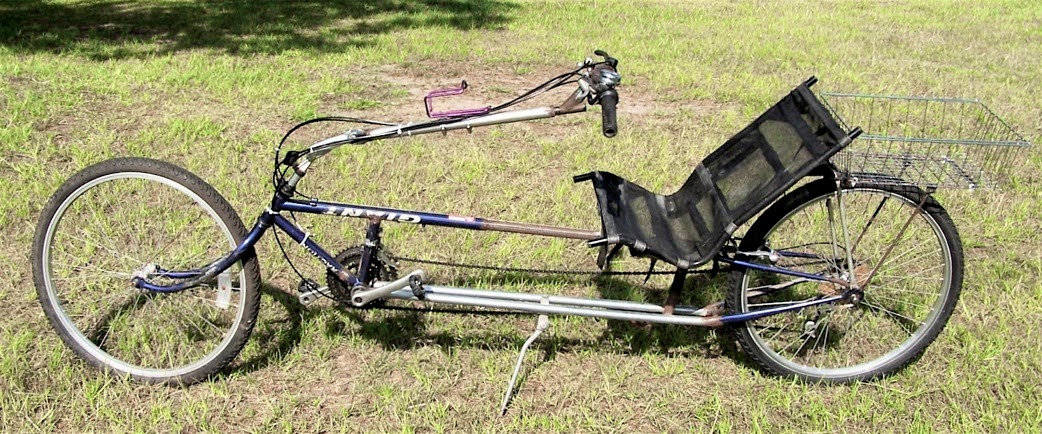
Overhead view of the brake unit ...
in the lower part of the foto ...
diagonally left and up from the maroon knob ...
you see a slot (or part of one) that the rotor disc fits into.
This unit clamps the rotor disc between 2 pads
to force the axle to stop.

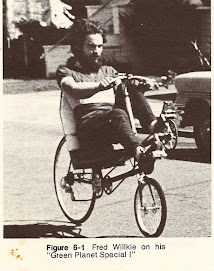
This is the disc brake unit off my EZ-Speedster ...
Needed to adapt it so that I can mount it on the DW trike.
I discovered that when properly positioned, I couldn't reach these allen head screws. So, I built this little 90 degree bracket which can be screwed to 2 other tabs that are welded to the frame. This allows me to place this unit vertically down over the disc rotor
and screw it in place.
The fun part will be getting it all to work together ...
without the rotor wobbling too much ...

Saturday, October 25, 2008

Brake Thingies

These are new brake pads ... 
some of the caliper brakes had the "C" pads
and the "V" brakes have the "V" pads.
I'll try whatever to see if they work.

The "V" brake that I added to the Speedster recumbent ...
had "C" pads on it ... 
and didn't seem to stop the wheel very well.
So, I changed to "V" pads ... now it works wonderfully.
(can't say the same about the caliper brakes ... )
(the ones on the trike ...)

This shows a disc brake rotor with an adapter on top of it.
I made the adapter to attach the rotor to the trike axle.
I just have to find nuts for the bolts ...

Here's a closer view of the adapter ... 
a 5/8" collar tack-welded to ...
and chunk of electrical box cover.

Wednesday, October 22, 2008

Flag Avoidance

When the flag is angled back and out to left ...
you find that drivers tend to go around the tip of the flag
and not try to crowd you and your bike.

Tuesday, October 21, 2008

Glitches & Mods #1

There's been a major glitch ... the brakes won't stop the trike. I've tried sanding the paint on the rims ... I've tried grinding off the hard rubber layer of the pads down to a fresh layer ... and nothing works. DRAT!
It rides and moves nicely otherwise! The boys think it is fantastic ... even though they had to use "Flintstone" brakes (drag your shoes on the ground).
I did read that one message about a smaller wheel further forward to change the chain angle so things work better ... I LIKE IT! This roller skate wheel had a soft outer layer ... but a hard plastic inner core.

Here's another view of the chain angle and routing ...
And, in case you were wondering ...
One grandson did go flying up over the curb today ...

Monday, October 20, 2008

Main Tube Bracing

Since this grandchild is known to "fly" off curbs ...
and in other ways test the limits of a bike ...
I figured I'd re-enforce the main tube.
Particularly since I only used 1-1/4" sq. tubing ...
(the plans call for 1-1/2" sq. tubing)

So, I tack-welded a piece of 3/4" angle iron
starting at the large gusset ...
running up to where the BB is set for kids.

Which places a triangular brace most of the length of the main tube.
I figure that should keep the grandkids from
bending the main tube.
I also re-enforced where the main tube and front up-tube meet.
(just in case ... )

More on Brake Brackets

Here's a view in the sunshine

A look at a bracket ...
The bracket is only 6" long ... so it's very sturdy.
we leaned 230 lbs on the end of this bracket ...
and we weren't seeing much flex.

Here's what the brackets look like from a front quarter view.
If I had mounted them so they were horizontal ...
they would have been longer ... and I would have triangulated them.

Saturday, October 18, 2008

DeltaWolf Trike - Fully Functional

Here's rear-quarter view showing both the brakes and the gear train.

I decided to use caliper brakes ... base on
something Jack Baker made.
So I welded up mirror image brackets to hold the brakes.

Here's with the caliper brake mounted

side view of the brake mount.

Matching brake mounts ...
the left brake lever controls the left brake ...
and the right lever controls the right ...
might help in making high-speed pivot turns ...

Here's a side view ... with room for leg growth of the rider.

Friday, October 17, 2008

DW Trike Gear Train

After I cut the axle into two parts ...
I removed one side and attached the free-wheel
gear cluster and adapter ... and 4" pulley.
Just trying the chain on for size ...
and I need to weld closed all those open ends ...

The 4 rear frames ends and the end of the main tube are welded closed.
I put the other axle and wheel back on ...
and welded a rear axle to the frame to use as a dérailleur hanger.
Still need to run a cable so it will shift ... put on a chain roller ...
AND ... brakes.
I did go ride it down the street just to verify it works ...

DW Trike Seat Mounts

Here's a better view of the two seat mounts.

Monday, October 13, 2008

Lazy Man Bike

This is your basic "lazy man" bike ...
I only have to pedal going up hills.

I have a rearview mirror attached to my glasses ...
I have an attractive bicycle helmet ...
and a safety vest for visibility ...
There are reflectors ... but I still have to work on the lights.

Monday, October 6, 2008

Motor Assisted Recumbent

Here is the Sun EZ-Speedster with the GEBE (Golden Eagle Bike Engine) mounted on the rear. The disk brake is coming off because the engine frame wouldn't fit around it. And even if I had been able to attach the engine frame ... It would have clamped the disk mechanism so it wouldn't work.

I ran a ground line (soldered to the switch) ..
connected to the bolt securing the engine brace.
It works really well.

The kill switch lines weren't long enough to go to the handlebars ...
So it is held in place by the clamp that holds the water bottle.
The original throttle cable is shorter than desired ...
but is draped under the seat and functions
without reducing "free play" in the cable length.
When I get some more "bullet" connectors ...
I'll lengthen the lines and mount the switch on the handlebars.

Due to the chain on the other side ...
I opted to put the throttle lever on the left side.
Which doesn't conflict with the majority of my shifting

This shows the kill switch on my handlebar stem.

I had to cut one of these cable routing thingies
off of another bike and weld it in this position under the seat
to allow for optimum use of the cable going to the rear brake/

Since I couldn't mount both the engine and disk brake ...
And the rear fork area was too wide for "V" brake posts ...
I cut this unit off the front of another bike
and welded it to the rear.
The thought of going down hills with only a front disk brake ...
was too scary a thought for me to consider ...
and since I plan on riding this bike 11 miles to work tomorrow ...
attaching a rear brake became a HIGH priority!

Friday, October 3, 2008

EZ-Speedster GEBE 1

This is an EZ_Speedster that I've mounted a Tanaka 32cc engine onto. I'm switching from a disk brake on the rear to a "V" brake ...
I'll post a foto when I've finished working that out ...

Since I don't have the usual bicycle fender connection point ...
this is how I connected the support brace so it doesn't move forward-backward ...